> ## Documentation Index
> Fetch the complete documentation index at: https://www.edgee.ai/docs/llms.txt
> Use this file to discover all available pages before exploring further.
# Meta Conversions API
> Send your conversion events directly to Meta's Conversions API (CAPI), **now at the edge**.
 Find it on GitHub: [ /edgee-ai/meta-capi-component](https://github.com/edgee-ai/meta-capi-component)
Meta Conversions API (CAPI) allows you to send web events directly to Meta from your server, ensuring reliable data tracking even with ad blockers or browser limitations.
With Edgee's edge integration, you can now send these events directly from the edge, improving both reliability and performance.
## Event Mapping
Here's how Edgee events map to Meta CAPI events:
| Edgee event | Meta CAPI Event |
| ----------- | ----------------- |
| Page | `PageView` |
| Track | Name of the event |
| User | `Lead` |
## User Identification
When you make a `user` call, Edgee stores the user's data (user\_id, anonymous\_id, and properties) on the device. This enables proper attribution for subsequent page views and events.
## Getting Started
**To integrate Meta CAPI into your Edgee project:**
1. Open the Edgee console and navigate to your project's Components.
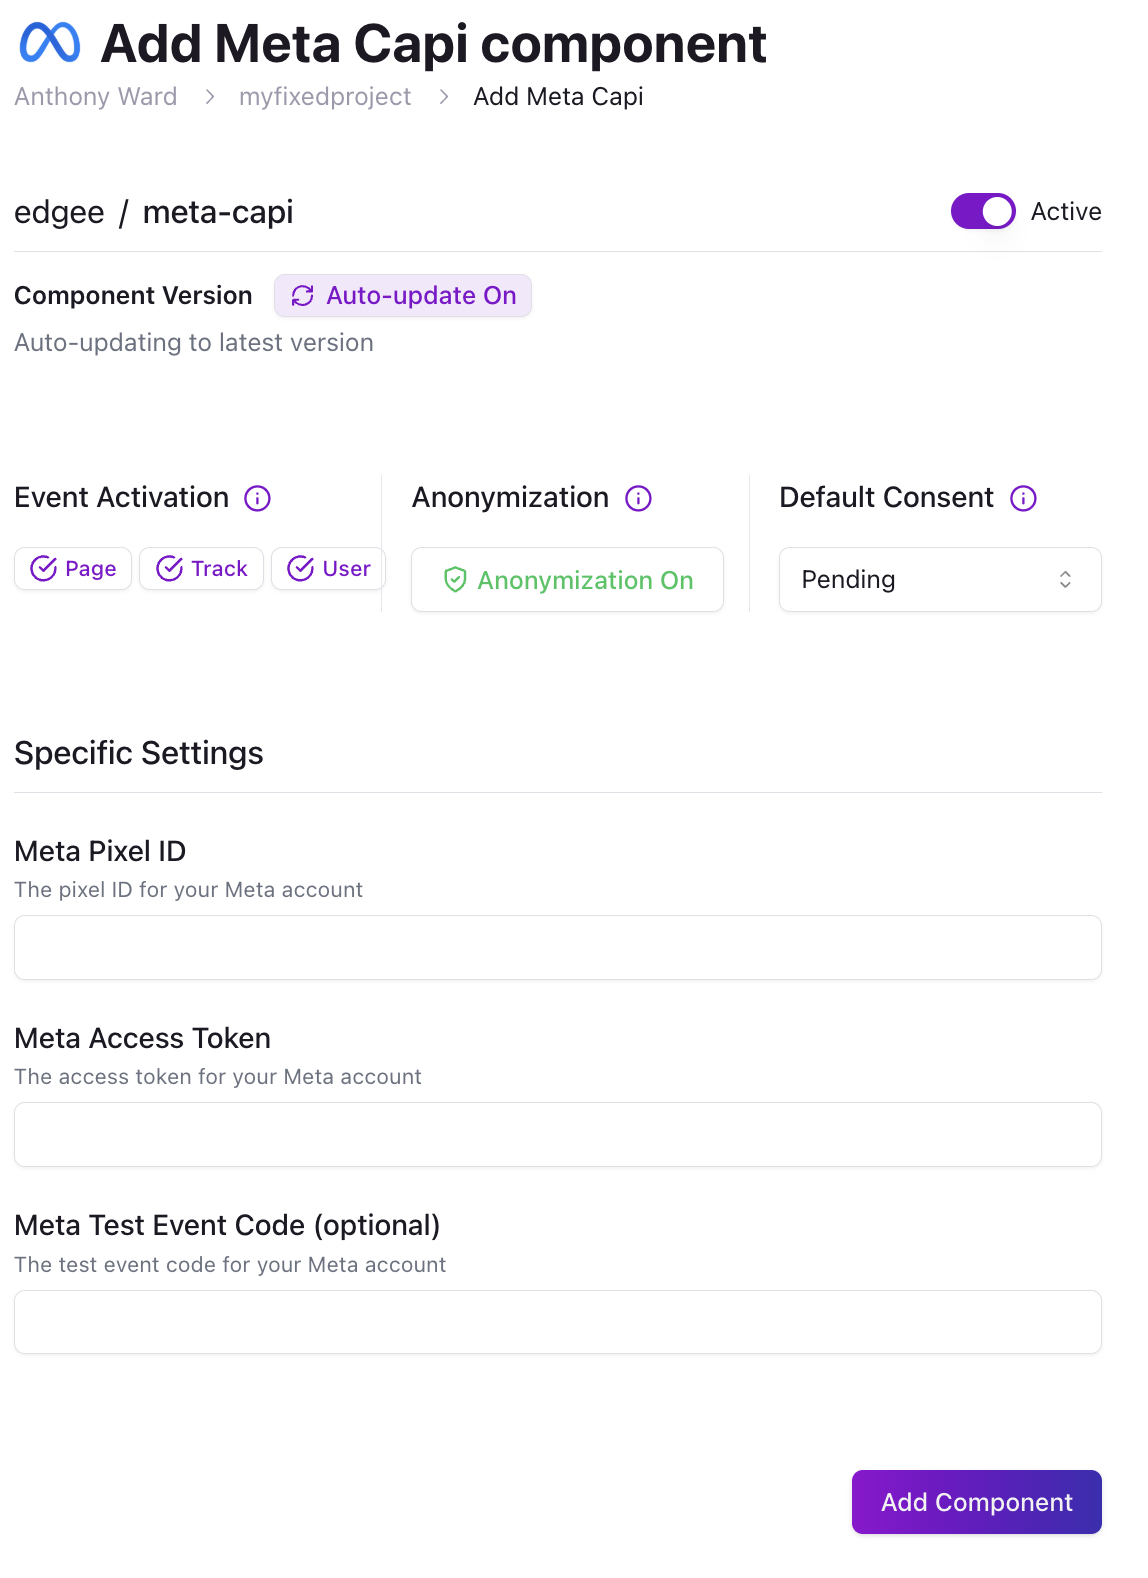
2. Select "Add a component" and choose `edgee/meta-capi` from the list of available components.
3. Enter the following credentials:
* `Meta Access Token`: Your Meta CAPI access token
* `Meta Pixel ID`: Your Meta Pixel ID
* `Meta Test Event Code` (Optional): For testing your implementation
4. Click Save to complete the setup.
To know how to get your access token and pixel ID, visit the [Meta Marketing API documentation](https://developers.facebook.com/docs/marketing-api/conversions-api/get-started).
## Component Name
When configuring the component in your **Edgee Data Layer** or within SDK calls, use `edgee/meta-capi` as the component name:
```json theme={"dark"}
{
"components": {
"edgee/meta-capi": true
}
}
```
## Testing Your Implementation
1. Set up your test events in Meta Events Manager
2. Add your test event code to the component configuration
3. Send test events through Edgee
4. Verify events in Meta Events Manager's Test Events tab
Use Meta's Test Event Code during implementation to avoid affecting your actual data and ad campaigns.
For more details on Meta Conversions API implementation, refer to the
[official Meta CAPI documentation](https://developers.facebook.com/docs/marketing-api/conversions-api/).
## Step by Step Set up Guide For Meta CAPI
Implementing the Meta Conversion API via Edgee is simple and straightforward. The next sections will guide you on:
1. Creating a Meta CAPI
2. Retrieving your access token
3. Configuring Meta CAPI in Edgee
### Create a Meta Conversion API Pixel
1. Go to [Meta Events Manager](https://www.facebook.com/events_manager2/list)
2. Choose your business account.
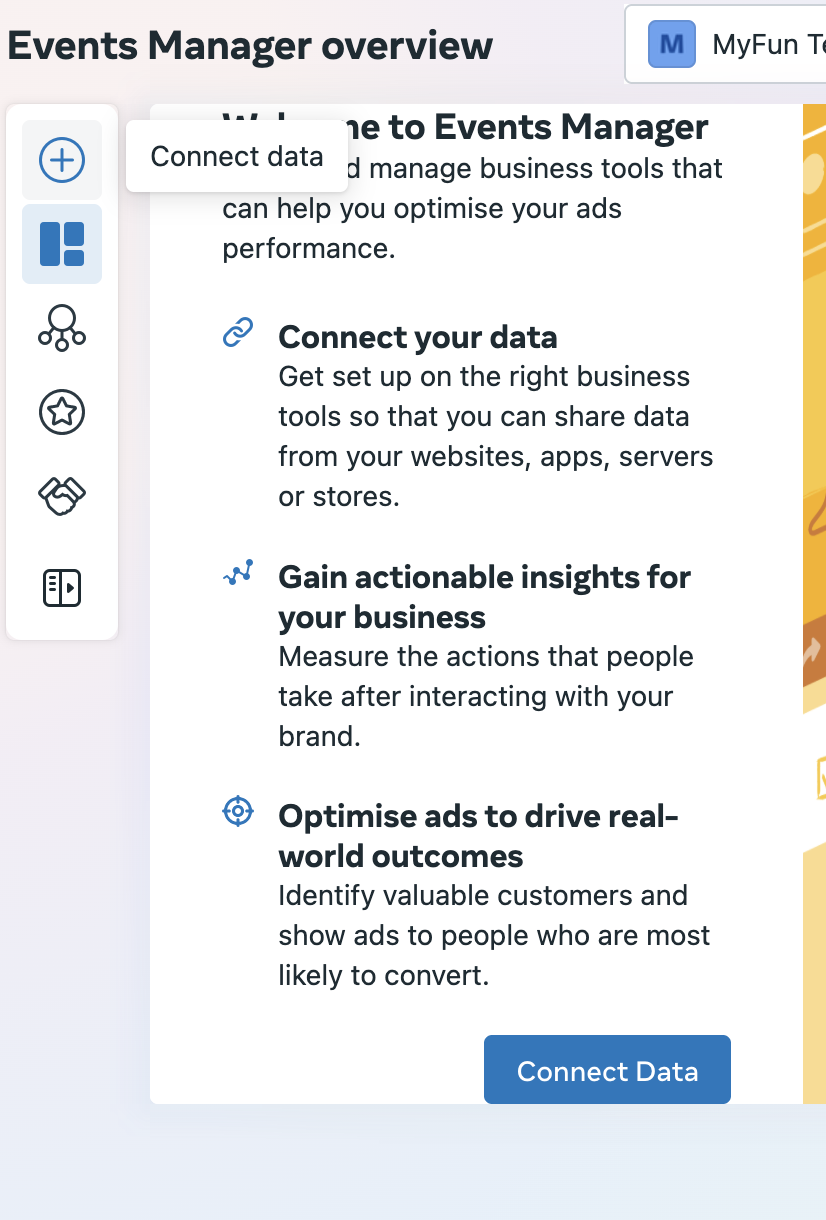
3. Click **“Connect Data”**
Find it on GitHub: [ /edgee-ai/meta-capi-component](https://github.com/edgee-ai/meta-capi-component)
Meta Conversions API (CAPI) allows you to send web events directly to Meta from your server, ensuring reliable data tracking even with ad blockers or browser limitations.
With Edgee's edge integration, you can now send these events directly from the edge, improving both reliability and performance.
## Event Mapping
Here's how Edgee events map to Meta CAPI events:
| Edgee event | Meta CAPI Event |
| ----------- | ----------------- |
| Page | `PageView` |
| Track | Name of the event |
| User | `Lead` |
## User Identification
When you make a `user` call, Edgee stores the user's data (user\_id, anonymous\_id, and properties) on the device. This enables proper attribution for subsequent page views and events.
## Getting Started
**To integrate Meta CAPI into your Edgee project:**
1. Open the Edgee console and navigate to your project's Components.
2. Select "Add a component" and choose `edgee/meta-capi` from the list of available components.
3. Enter the following credentials:
* `Meta Access Token`: Your Meta CAPI access token
* `Meta Pixel ID`: Your Meta Pixel ID
* `Meta Test Event Code` (Optional): For testing your implementation
4. Click Save to complete the setup.
To know how to get your access token and pixel ID, visit the [Meta Marketing API documentation](https://developers.facebook.com/docs/marketing-api/conversions-api/get-started).
## Component Name
When configuring the component in your **Edgee Data Layer** or within SDK calls, use `edgee/meta-capi` as the component name:
```json theme={"dark"}
{
"components": {
"edgee/meta-capi": true
}
}
```
## Testing Your Implementation
1. Set up your test events in Meta Events Manager
2. Add your test event code to the component configuration
3. Send test events through Edgee
4. Verify events in Meta Events Manager's Test Events tab
Use Meta's Test Event Code during implementation to avoid affecting your actual data and ad campaigns.
For more details on Meta Conversions API implementation, refer to the
[official Meta CAPI documentation](https://developers.facebook.com/docs/marketing-api/conversions-api/).
## Step by Step Set up Guide For Meta CAPI
Implementing the Meta Conversion API via Edgee is simple and straightforward. The next sections will guide you on:
1. Creating a Meta CAPI
2. Retrieving your access token
3. Configuring Meta CAPI in Edgee
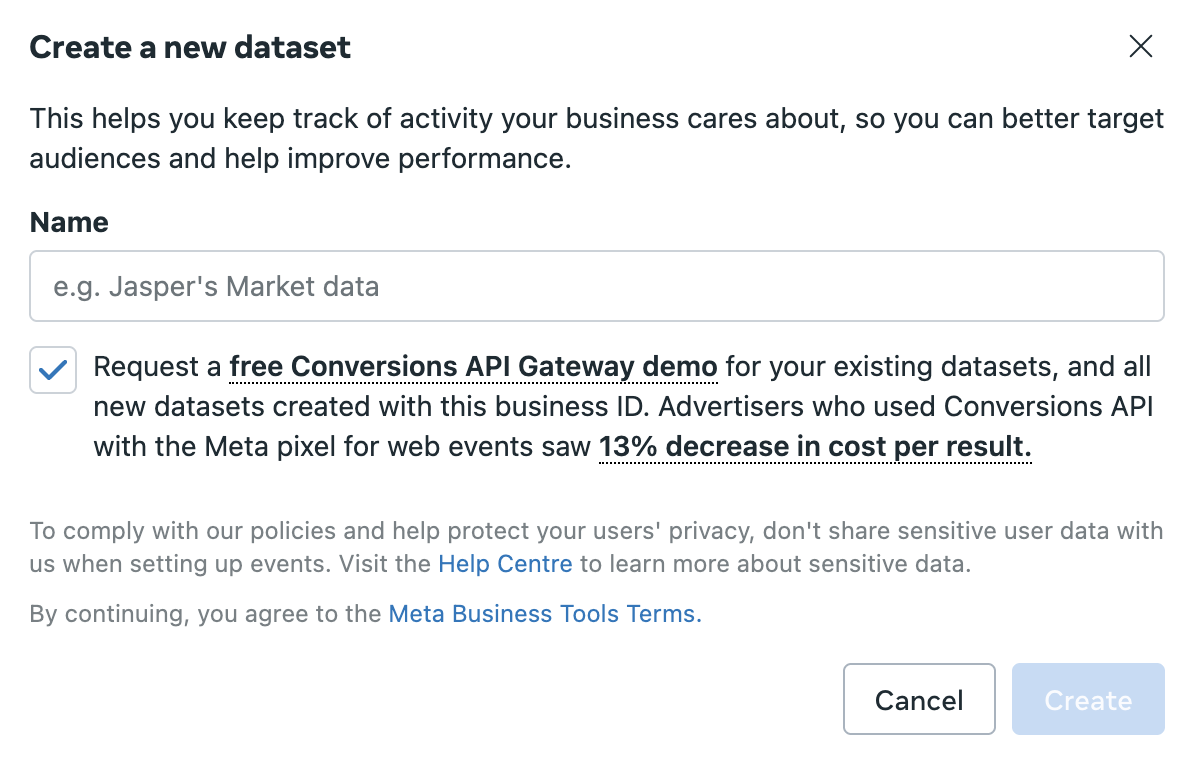
### Create a Meta Conversion API Pixel
1. Go to [Meta Events Manager](https://www.facebook.com/events_manager2/list)
2. Choose your business account.
3. Click **“Connect Data”**
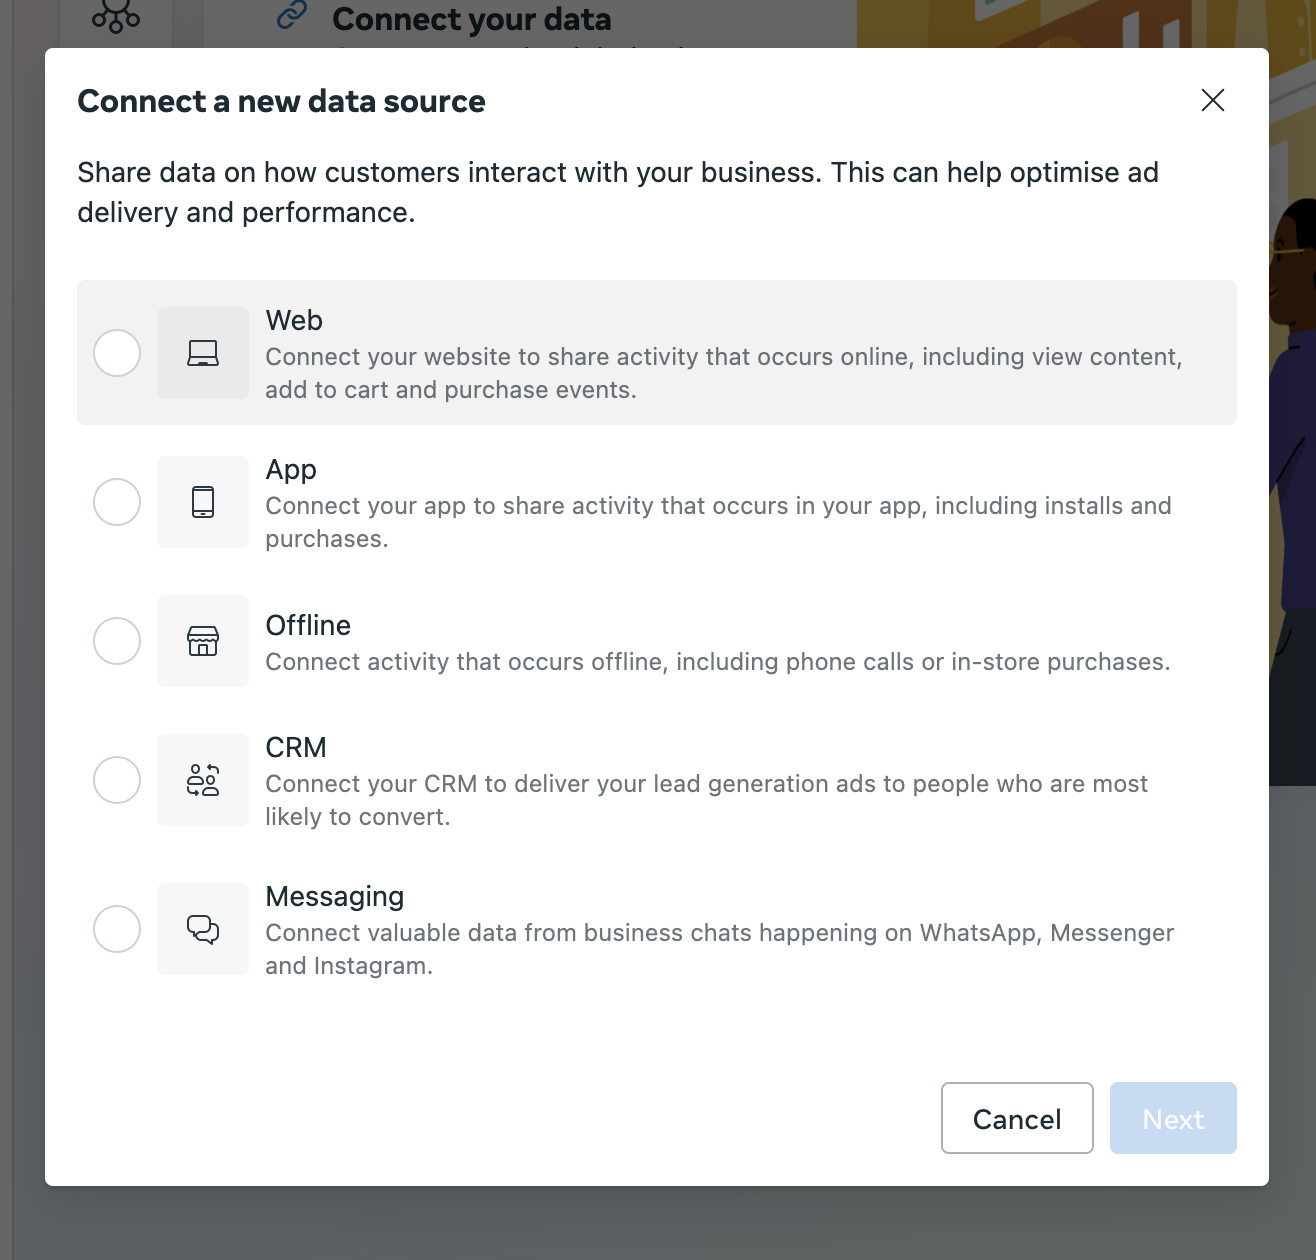
 4. Select Web
 5. Name it, assign a website if needed.
 ### Get Your Meta Capi Access Token
1. In Events Manager, select your Pixel
2. Go to **Settings**
### Get Your Meta Capi Access Token
1. In Events Manager, select your Pixel
2. Go to **Settings**
 3. Scroll to **Conversions API** → click **"Generate access token"**
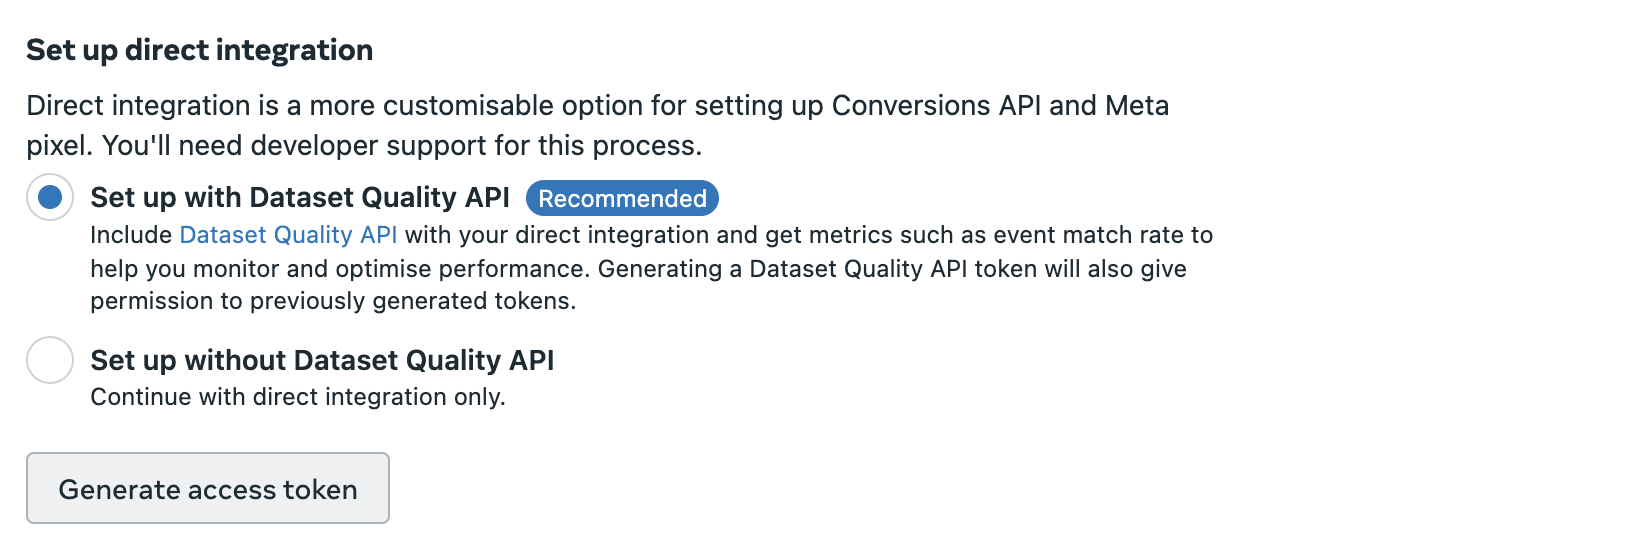 4. Copy this access token securely (you’ll need for setting up in Edgee platform)
### Configure Meta CAPI in Edgee
1. Log in to your **Edgee account** and navigate to your project.
2. Go to **Components** (see documentation if needed).
3. Select **Meta Capi**, then **paste your Conversion Pixel ID and access token** into the required field.
4. Copy this access token securely (you’ll need for setting up in Edgee platform)
### Configure Meta CAPI in Edgee
1. Log in to your **Edgee account** and navigate to your project.
2. Go to **Components** (see documentation if needed).
3. Select **Meta Capi**, then **paste your Conversion Pixel ID and access token** into the required field.